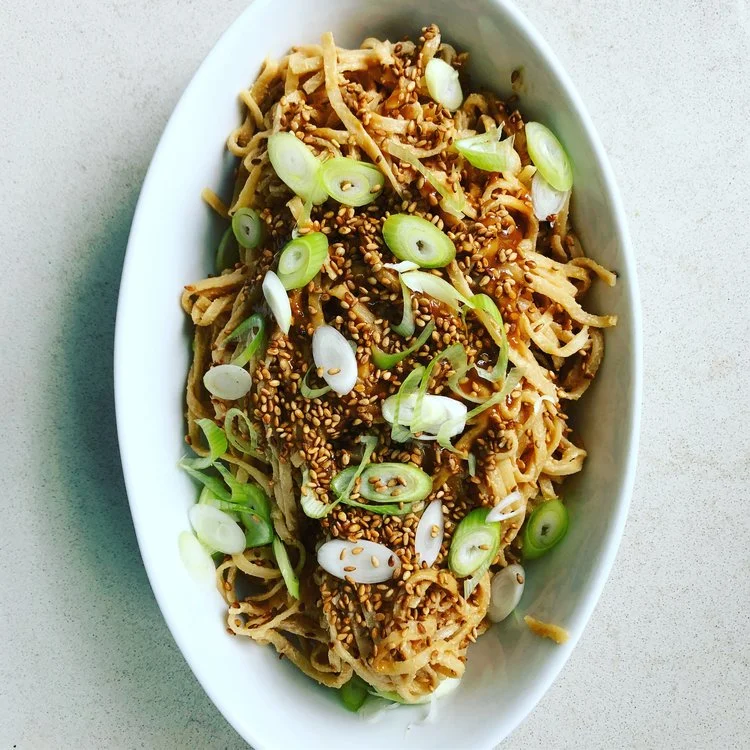
Ninja Sesame Sauce
I don’t know about where you’re at, but it’s still hot as hell where we are, with 99% humidity. Cold meals are where it’s at! I have literally never met a person who would not eat my cold sesame noodles when presented with a beautiful dish of them on a hot day.

To make this salad, cook rice noodles according to package directions, rinse in cold water and dress with the sauce. Chill and garnish with toasted sesame seeds and thinly sliced scallions.
I wish I had a warm and fuzzy or funny story to tell you about sesame seeds or sesame noodles, but I simply do not. All I will say is that this sauce is like a ninja. It can shapeshift and appear as a different character in so many places…Dip your fresh rolls in it, mix it into cold, cooked rice noodles, swirl it into mayo and spread on toast with cooked chicken, avocado, and thinly sliced radishes for the most oddly delicious sandwich ever, cut up some veggies and use it as a dip, straight up…It is spectacularly addictive, so be careful and consider yourself warned!
Ninja Sesame Sauce
Makes about 1 cup
Ingredients
1/2 cup Tahini
2 tablespoons of soy sauce
2 tablespoons of rice vinegar
2 tablespoons of toasted sesame oil
2 tablespoons of honey
1 inch piece of ginger, frozen and grated with a microplane grater
1 small clove of garlic, minced
a little hot water to thin the sauce
Method
Literally whisk everything together and you are done. Brilliant, right?
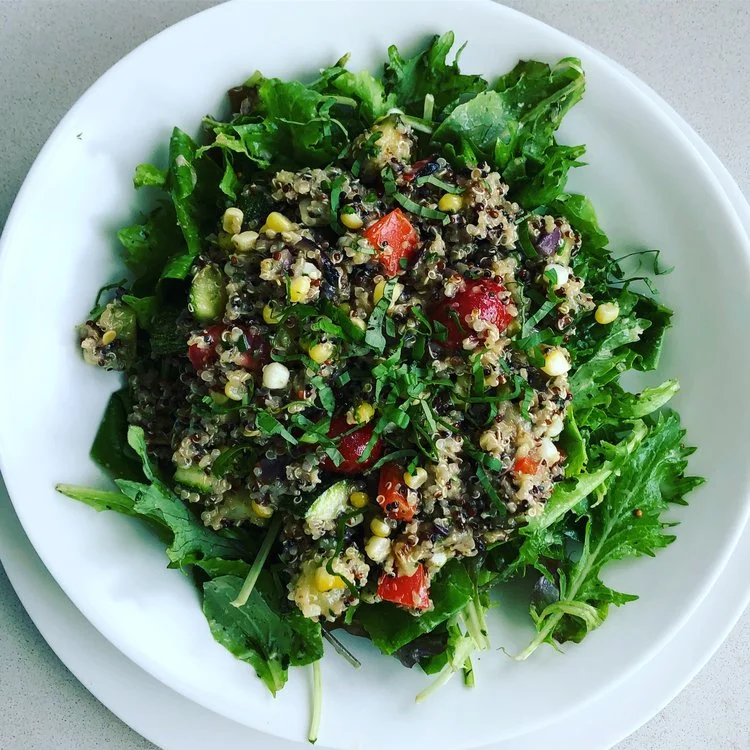
Quinoa, ugly and delicious
For real. I love incorporating quinoa into salads and showcasing it as a delicious and less likely side dish, but man, it’s hard to make it pretty. I tend to fancy it up with lovely vegetables or plate it with other good looking proteins or sauces. My favorite thing lately is a kitchen sink type of quinoa salad. I grill up a bunch of veggies (or better yet, use left over ones), cook and cool the quinoa, make a bracing and acidic dressing and shower the final mix with fresh herbs. If you make the quinoa before and grill extra stuff, it’s really fast to put together.

A few things-I have read a bunch about the best way to cook quinoa and here is what I know is true.
One cup of quinoa to 1 3/4 cup of liquid for cooking (I almost always use broth or stock).
Rinse and rub the hell out of the quinoa under cold running water in a fine strainer for a couple of minutes and then dry in a hot saucepan for a couple of minutes. (This takes away any bitterness)
Once cooked, I usually put the pan into an ice bath to cool it down so it stops cooking and doesn’t get gummy.
That’s it folks! Here is the recipe for a very popular quinoa salad that I actually think doesn’t look too, too terrible.
Quinoa Salad with Grilled Veggies and Red Wine Vinaigrette
Serves 2-3 as a side dish
Ingredients
1/2 cup quinoa (washed well)
3/4 cup broth, stock or water
1/2 teaspoon oil
1/4 cup grilled or roasted and diced red pepper
1/2 cup grilled or roasted and diced eggplant
1/2 cup grilled or roasted and diced zucchini or yellow squash
1/4 cup grilled or roasted and diced red onion
1 ear of corn, grilled or roasted, and cut off the cob
6-8 cherry tomatoes, cut in half
Dressing
1 teaspoon coarse mustard
1 teaspoon smooth dijon mustard
1 small mashed garlic clove
1/2 shallot, minced finely
1/4 cup minced fresh parsley
1 tablespoon minced fresh oregano (or a teaspoon dry)
1/4 cup red wine vinegar
1/2 cup olive oil
salt and pepper to taste
Method
Cook the quinoa by boiling the liquid, dumping in the quinoa and oil and bringing back to the boil. Turn down the heat to the lowest setting, cover and set a timer for about 15 minutes. When it’s cooked (taste it!), stick the whole pan in a large bowl of ice cubes and water to cool down. Once cool, fold in the vegetables.
Make the dressing by combining all of the ingredients in a bowl and whisking till emulsified. Alternately, you can throw them all whole into a vitamix or cuisinart and blitz them into a dressing.
Carefully add the dressing to your salad, tasting to make sure you don’t over dress. Add salt and pepper to taste and if you like, add another handful of herbs (chives or parsley) to the finished salad.

A Lovely Asian Slaw
So many slaws! I already went on and on about this last week, so I will spare you the rant. Today I wanted to do creamy sesame noodles with crab cakes and needed something bright, colorful, acidic, and vegetable-forward to round out the lunch menu. This salad was the perfect choice. It would also be a great match for a marinated and grilled flank steak, teriyaki type chicken, or piece of miso marinated fish. So much versatility!

Before you start cooking though, I’m going to shamelessly plug for a tool that I think most cooks can afford and is indispensable if you love and work with vegetables regularly. It is the Benriner Mandoline Slicer and once you get into a routine of using it, you will never look back. It has three blades, two of which do more fancy shreddy type things. The flat blade is perfect for 99% of my needs. Think perfect potato slices for gratins, thinly shaved veggies for gorgeous salads, fine shredding for slaws, identically sized apple slices for tarts...you get the picture. It’s available for under $40 on Amazon and I tell everyone I know who loves cooking to get one.
One final note-every vegetable in this beautiful salad was available at the farm market today, so hooray for the farmers! Now, cook!
Asian Inspired Slaw
Serves 6
Ingredients
1 1/2 cups of Green Cabbage, sliced very thinly (use a mandoline if you have one)
1 1/2 cups of Purple Cabbage cut the same way as the green
1/2 cup thinly sliced red onion (mandoline) soaked in 2-3 tablespoons of rice vinegar for about 10 minutes
1/2 cup of thinly sliced red pepper (mandoline)
1/2 cup of shredded carrot (either use mandoline to get super thin slices and then cut into fine shreds with a knife, or use the coarse holes on a grater)
1/2 cup of shredded radish (approach the same as carrot)
1/2 cup minced cilantro
2 tablespoons minced chives
Juice and zest of 2 limes
2 tablespoons dark toasted sesame oil
2 tablespoons of peanut oil
1 tablespoon of honey
Sriracha and salt to taste
Method
Toss everything together and stick in the fridge to chill for at least 15 minutes. Taste for seasoning.

The Importance of Beets and Family Meals
As a kid, during our summers spent with my grandparents on Nantucket, we ate dinner together outside every night. My sisters and I would spend the later part of the afternoon running wild with neighborhood friends and around 6 o’clock we would hear the bell ringing (yes, Marjorie had a brass dinner bell!) and know it was time to get on our bikes and make our way home to help set the tables. There were two tables made of heavy cedar, and the adults sat at the large one in chairs with arms and my sisters and I sat at the smaller one on less comfortable benches. Every single night, we were expected to bring all of the place settings out on trays and then clear the tables at the end of the meal. Honestly, I never knew anyone else at the time who prepared for and ate dinner that way; with such care and intention. It was one of the few constants in a fairly chaotic and crazy childhood, and I still feel grateful for it every day.
My husband also cooks for a living and all of the young people who live with us in the summer work many long hours (a gaggle of 20-somethings, both related and honorarily related). Most nights, even when we get home late from our respective food jobs, we attempt to sort out some kind of dinner. Mostly big bowls of salad, something grilled and a sheet tray piled with a filling veggie or starch. We don’t sit at separate tables, rather finding a mismatched chair around the fire pit with plates in our laps. There is often storytelling, music and singing, and most importantly, shared family time involving food.

There are some dishes that were constants on my grandmother’s tables. One of my favorites was her simply prepared beet salad. Dark red beets (there really were only one kind back in those days), white wine vinegar, minced shallot, dill, oil, salt and pepper. That was it. I adored that salad and have made it a million times for my own family and clients too. I also make slightly fancier beet salads and here is one that you can either toss together messily, make pretty on a platter family style, or even plate individually if you are feeling fancy. I personally recommend family style, as that is my happiest way to eat.
Beet Salad with Feta, Mint and Hazelnuts
Feeds 2-4 depending on the appetite
Ingredients
1 bunch of small to medium sized beets (whatever kind you love best)
2 tablespoons of white wine or champagne vinegar
1/3 cup of crumbled feta (the best you can afford)
2 tablespoons of toasted hazelnuts
A handful of minced mint leaves
A healthy splash of your best EVOO
Salt and Pepper to taste (be careful as the feta is salty!)
Method
Cut the beet tips off, leaving about 2 inches of stem. Don’t bother washing them! Cook in a large pan of boiling salted water until you can easily stick a knife in the largest beet-about 20-40 minutes, depending on size (I use about a handful of kosher salt in all vegetable cooking water). When they are done, quickly run cold water over them until they are cool enough to work with. Cut the tops and tails off with a paring knife and the skins should slip off easily. This method also works for roasting beets. Slice into pretty rounds, about 1/8 inch thick.
If using a platter, scatter the rounds on it and slash evenly with the vinegar. Scatter the feta, then nuts, then mint over the beets. Splash with EVOO, grind a little pepper and sprinkle a little salt. Share with your loved ones.
If you are feeling casual, you can dice the beets and throw all the ingredients in a bowl together and serve over some lightly dressed greens. Or plate individually for a fancier look.
Keeping it cool and cucumbery
It’s been a challenge to turn the stove on this week. I feel so lucky to live on an island in the middle of the ocean, where there is almost always a breeze and it’s usually 10-20° cooler than the mainland. The past few days have thrown that notion out the window however, with temperatures in the mid to high 80’s with heavy duty humidity...Okay, no more complaining about the weather. How about the topic of cold soups?
I keep hoping to see field tomatoes at Bartlett’s and they are still not in! Moors End has some that are a little funky and misshapen. Just not a great year for the tomatoes, I guess. But cucumbers on the other hand....They are spectacular! I love the English variety from Moors End-advertised as “burpless”, they have few seeds and are super crispy and refreshing. Just the thing for making a quick batch of cold cucumber soup!
I fed two ladies for lunch and this recipe made exactly enough. I have also made it for a crowd and the measurements may be easily doubled or tripled.
Cold Cucumber Soup
ingredients
1 large English cucumber (just about a pound), peeled, seeded and chopped
1 cup of plain yogurt (literally any kind you like, even dairy free)
1/2 cup of buttermilk (or water if going dairy free)
1 tablespoon of minced shallot
1 clove minced garlic
2 T sherry vinegar
A handful each of minced parsley, chives, and dill
Salt and pepper to taste
Water to thin the soup
Method
Literally dump all the ingredients, except the salt, pepper and water into a blender and blast at the highest speed until puréed. Add the last three ingredients to suit your preferences for flavor and consistency. Serve super cold with some more herbs on top, or croutons, or an herb oil...

Curried Chicken Salad Circa 1986
I have a confession to make. I own more than 500 hundred print cookbooks. There wasn’t enough space in my home and so my husband built a special giant bookcase for all of them. It’s hard, because I love them all and I also need to downsize pretty soon. I have a dream of going through them all and photographing the best recipes for my collection in Evernote. This will clearly never happen. I want to keep like 50 of them...well, maybe 100 tops...and Time Life Foods of the World counts as one, right? Oy vey. Please send help!
A couple of my favorites were released in the 80’s. Martha Stewart’s first book, The Silver Palate, and an old fish cookbook by Jasper White that has a killer recipe for gravlax made with bluefish (yes!). Something most of the books from that particular era have in common is a love of adding curry to dishes that don’t typically ask for it. I guess it was a thing back then? Curried chicken salad was definitely THE thing in those days. I have a nostalgic memory of my grandmother making it and loving every bite, except the ones with raisins. Raisins are my nemesis. Always were and always have been.

My chicken salad has pretty standard ingredients, but there is one that is new to me this year and I LOVE it! It is a curry paste in a tube from a company called Entube and it is fiery, fresh, and delightfully authentic. They also make harissa, molé, and umeboshi pastes. I highly recommend their products and at the moment, you can grab a tube at Bartlett’s Farm if you’re on island. If not, the internet is your bff.
If you need yet another chicken salad recipe (or tofu, if you’re into that sort of thing), then look no further. And be careful with that curry paste-it’s hot af and you might want to supplement it with some milder powder to keep the heat down. Okay! Ready, set, go!
Curried Chicken Salad
Ingredients
1 whole roasted chicken, torn and/or cut up into bite sized pieces. (Yes, it can be a rotisserie!)
Juice of two limes and the zest of one
2 stalks of celery, cut in fine dice
1 tiny red onion (or a quarter of a bigger one), minced finely
1/2 of a Granny Smith Apple, peeled, cored and finely diced
1 teaspoon of Entube Curry Paste (or less of you’re sensitive to heat)
1-2 teaspoons of less spicy curry powder (optional)
1/2-3/4 cup of mayonnaise, either Hellman’s or your own
1 tablespoon of Major Grey’s Chutney (avoiding the few super secret raisins hidden in the jar)
Salt to taste-about a teaspoon or so
A big handful of chopped cilantro
A big handful of toasted, slivered almonds
Method
Squeeze the lime juice onto the chicken in a large bowl. Fold in the zest and the rest of the ingredients, except the almonds. Serve in a pretty bowl with the nuts sprinkled on top.

Buy this now! Hi
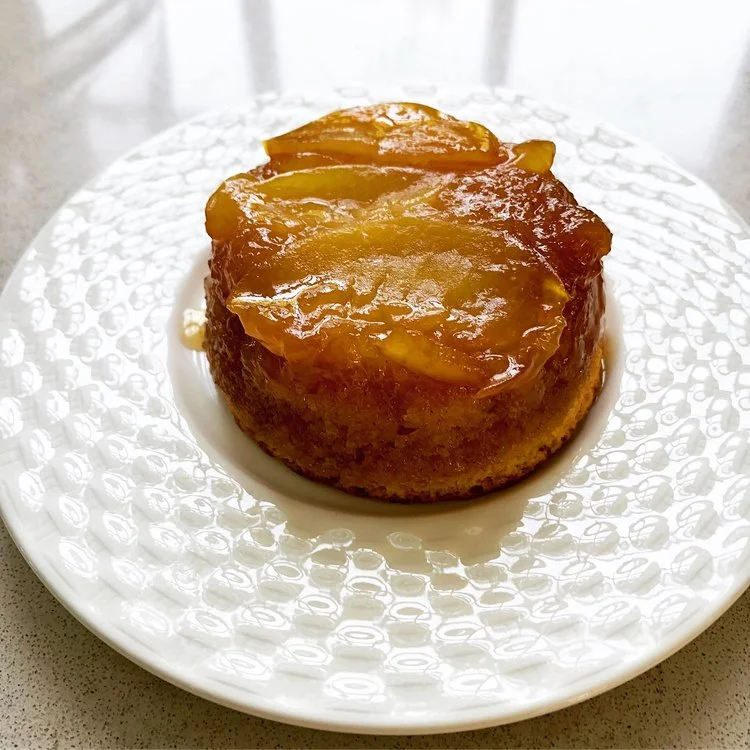
Cakelet: My new favorite word!
When I was a kid I loved baking, read Gourmet magazine religiously, and once sent away for an informational packet for a Kitchen Aid mixer. In the 1970’s, you had to fill out a form, cut it from the back of the magazine and send it in an addressed, stamped envelope. Considering my typical dysfunctional 70’s childhood, it’s remarkable that I was able to do all of these things. When the large yellow envelope arrived, I felt an incredible excitement and then total sadness as I read the cost of this dream machine (the equivalent of $300 now). I then went back to using my grandmother’s avocado green handmixer.
The lack of a Kitchen Aid did not stop me from passionately baking elaborate cakes and desserts all throughout my childhood. I was lovingly gifted one by my generous mother-in-law when I was pregnant with my now 23 year-old daughter. And although for many years I used it almost to death (along with the Kitchen Aids of many clients), I more recently have found myself reverting back to making many of my desserts with a small hand mixer or wooden spoon. They all do the same job in the end.

You don’t need a fancy mixer, but a hand mixer is handy...
This recipe can be made with a big kickass mixer, small handmixer, or wooden spoon. It looks a little long and complex for such a tiny outcome, but it is worth it for the sweet, cute, deliciousness! And it can be made a little ahead of time (same day) and looks very elegant finishing off a fancy dinner party. The best part of it in my mind however, is when you present it as a CAKELET, the best word ever! Now, get moving and make them!
Caramelized Upside-Down Plum Cakelets
Makes 6 individual servings.
Ingredients
6 tablespoons + 4 tablespoons of unsalted butter, softened
1/3 cup light brown sugar, firmly packed
5 plums, pitted and sliced
3/4 cup gluten free flour
1/2 teaspoon baking powder
Big pinch of baking soda
1/4 teaspoon powdered ginger
Pinch salt
1/2 cup granulated sugar
Zest of 1/2 a lemon or orange
1 egg
1 teaspoon vanilla extract
1/2 cup buttermilk
Method
Preheat oven to 350°F. Butter the ramekins generously and place them on a small, parchment or greased foil-lined baking tray (I use a 1/4 sheet size and you will thank me for lining it in the end!). Melt 6 T of the butter in small saucepan over medium-low heat. Add brown sugar and whisk. It will separate and look super greasy at first, but persist and it will turn into a silky and smooth sauce. Pour carefully into equal amounts into the ramikins and place a fanned layer of plum slices right onto the sauce.
Sift the five dry ingredients into a smallish bowl.
Use an electric hand mixer (or wooden spoon) to cream the 4 T of butter with the sugar and orange zest. Add the egg and vanilla till combined. Alternately add the dry ingredients and the buttermilk to the batter.
Divide the batter into the ramekins and bake for 30 to 40 minutes, until the cakes are firm to the touch, and a toothpick or skewer inserted in the center comes out clean.
Cool on a rack until you can just pick them up. Run a small knife around the edges of the cake and flip onto small serving plates. If you buttered the ramekins well, the should come out easily. You may have a reluctant piece of plum to fish out and rearrange.
You can serve these warm or at room temperature. I love them with a little whipped cream that you’ve added a few spoonfuls of creme fraiche to...They don’t do quite as well the next day.

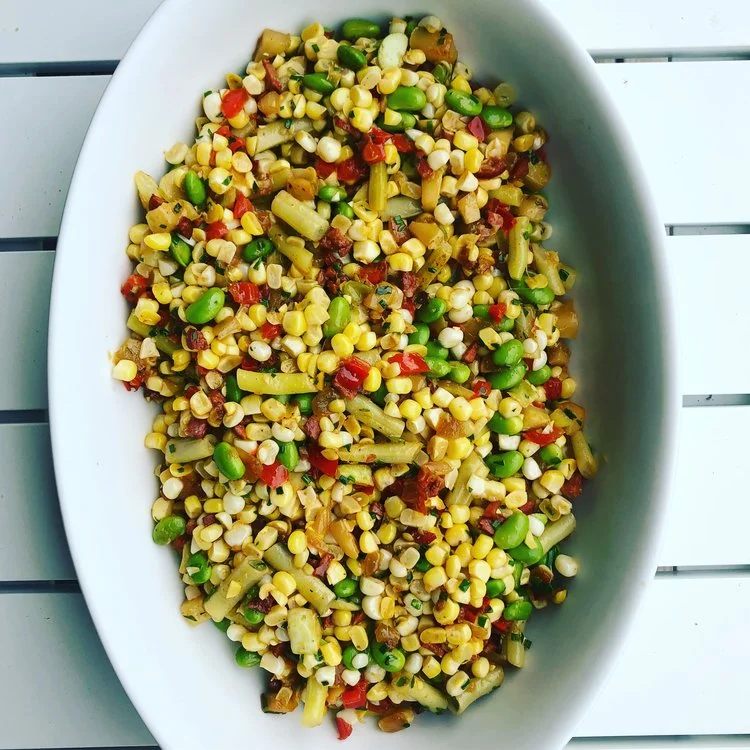
Summering Succotash
It’s Sunday and 5am. I’m tired as hell, ready for a day off, and what am I doing? Thinking, reading, and writing about food. Specifically, succotash. Honestly, I can’t believe I’m even admitting this in a public forum!
I did not grow up eating succotash, but I truly adore it. Curious about the origins of this dish, I just Googled it and was surprised to find out that the name is actually derived from a Narragansett word for “broken corn” which makes sense, corn being the main ingredient. My association with it as a southern dish is not unfounded, but it tends to be more of a catch all title for any kind of vegetable medley, involving corn.
Oh, corn! It is so good at this very August moment, but philistine that I am, I hate eating it on the cob. It literally drives my teeth insane. Because of this sad state, I am always looking for ways to eat corn off the cob. You can see where this is going, right?
But before I tell you how to cook the dish, I’m going to digress again and profess my love for flexible and easy going recipes. Also for recipes that can be prepped a bit in advance and finished off at the last minute. I also want to express adoration for a recipe that can be eaten cold the next day, uses ingredients that are local and seasonal, and (in my case) almost entirely vegetable. This recipe hits all the marks (please check out the additional suggestions below).

Summer Succotash
Ingredients
2 T butter or ghee
1/2 of a red pepper, cut in small dice
1/2 of a vidalia onion, also cut in small dice
1 clove of garlic, minced
1 link of good linguiça, cut into tiny dice
1 or 2 small patty pan squash, cut into small dice
2 T butter or ghee
4 ears of corn, shucked and kernels removed (I lay the corn on its side and cut lengthwise).
Around 12 good sized green or wax beans, quickly cooked in salty boiling water for a minute and then shocked in ice water and chopped into one inch pieces
1 C cooked Lima beans or edamame (I used edamame as there were no shell beans in at the farm)
A handful of minced chives
Salt and pepper to taste (careful with the salt-linguiça is salty!)
Method
Get a nice big sauté or frying pan and heat over medium low heat for a couple of minutes, before melting the butter. Sauté the peppers,onions, and garlic for a few minutes, stirring and NOT browning. Add the linguiça and turn the heat up a notch. When some of the fat has rendered, crank the heat to high, add the squash and a half cup of water. Shake and cook for a minute or two. Add the remaining butter and then dump in the corn and both beans. Shake and cook for another minute or two, just to heat through. Taste for salt, generously pepper and sprinkle in the chives.
Suggestions
If you want to prep ahead, stop after the squash is cooked. When you are ready to eat, heat the remaining butter in a separate pan, quickly heat up the corn and beans and then add the squash misxture.
If you don’t eat meat, omit the linguiça and maybe throw in a spoonful of smoked paprika.
As mentioned, eat this cold the next day with a little salad dressing if you like. Or reheat and top with a fried egg and hot sauce for breakfast.