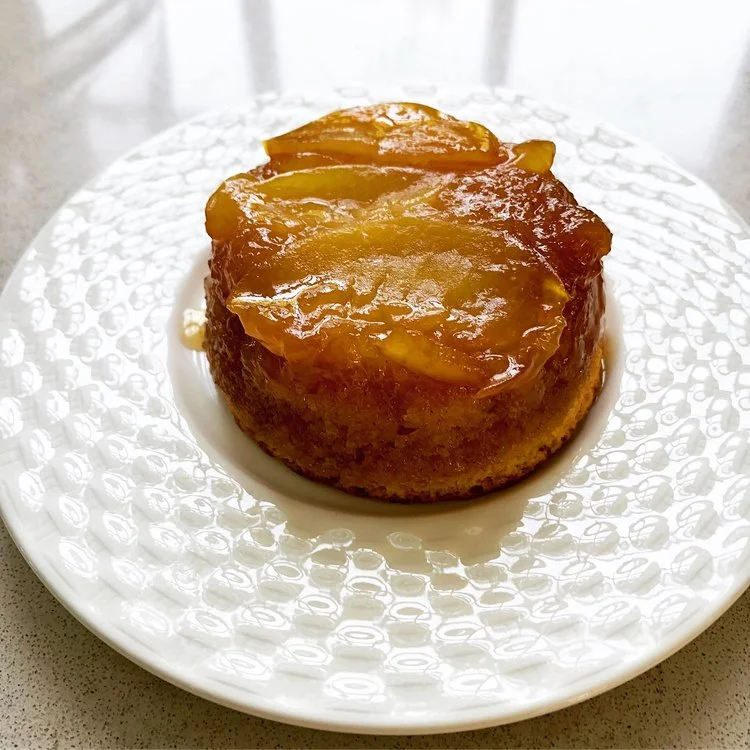
Cakelet: My new favorite word!
When I was a kid I loved baking, read Gourmet magazine religiously, and once sent away for an informational packet for a Kitchen Aid mixer. In the 1970’s, you had to fill out a form, cut it from the back of the magazine and send it in an addressed, stamped envelope. Considering my typical dysfunctional 70’s childhood, it’s remarkable that I was able to do all of these things. When the large yellow envelope arrived, I felt an incredible excitement and then total sadness as I read the cost of this dream machine (the equivalent of $300 now). I then went back to using my grandmother’s avocado green handmixer.
The lack of a Kitchen Aid did not stop me from passionately baking elaborate cakes and desserts all throughout my childhood. I was lovingly gifted one by my generous mother-in-law when I was pregnant with my now 23 year-old daughter. And although for many years I used it almost to death (along with the Kitchen Aids of many clients), I more recently have found myself reverting back to making many of my desserts with a small hand mixer or wooden spoon. They all do the same job in the end.

You don’t need a fancy mixer, but a hand mixer is handy...
This recipe can be made with a big kickass mixer, small handmixer, or wooden spoon. It looks a little long and complex for such a tiny outcome, but it is worth it for the sweet, cute, deliciousness! And it can be made a little ahead of time (same day) and looks very elegant finishing off a fancy dinner party. The best part of it in my mind however, is when you present it as a CAKELET, the best word ever! Now, get moving and make them!
Caramelized Upside-Down Plum Cakelets
Makes 6 individual servings.
Ingredients
6 tablespoons + 4 tablespoons of unsalted butter, softened
1/3 cup light brown sugar, firmly packed
5 plums, pitted and sliced
3/4 cup gluten free flour
1/2 teaspoon baking powder
Big pinch of baking soda
1/4 teaspoon powdered ginger
Pinch salt
1/2 cup granulated sugar
Zest of 1/2 a lemon or orange
1 egg
1 teaspoon vanilla extract
1/2 cup buttermilk
Method
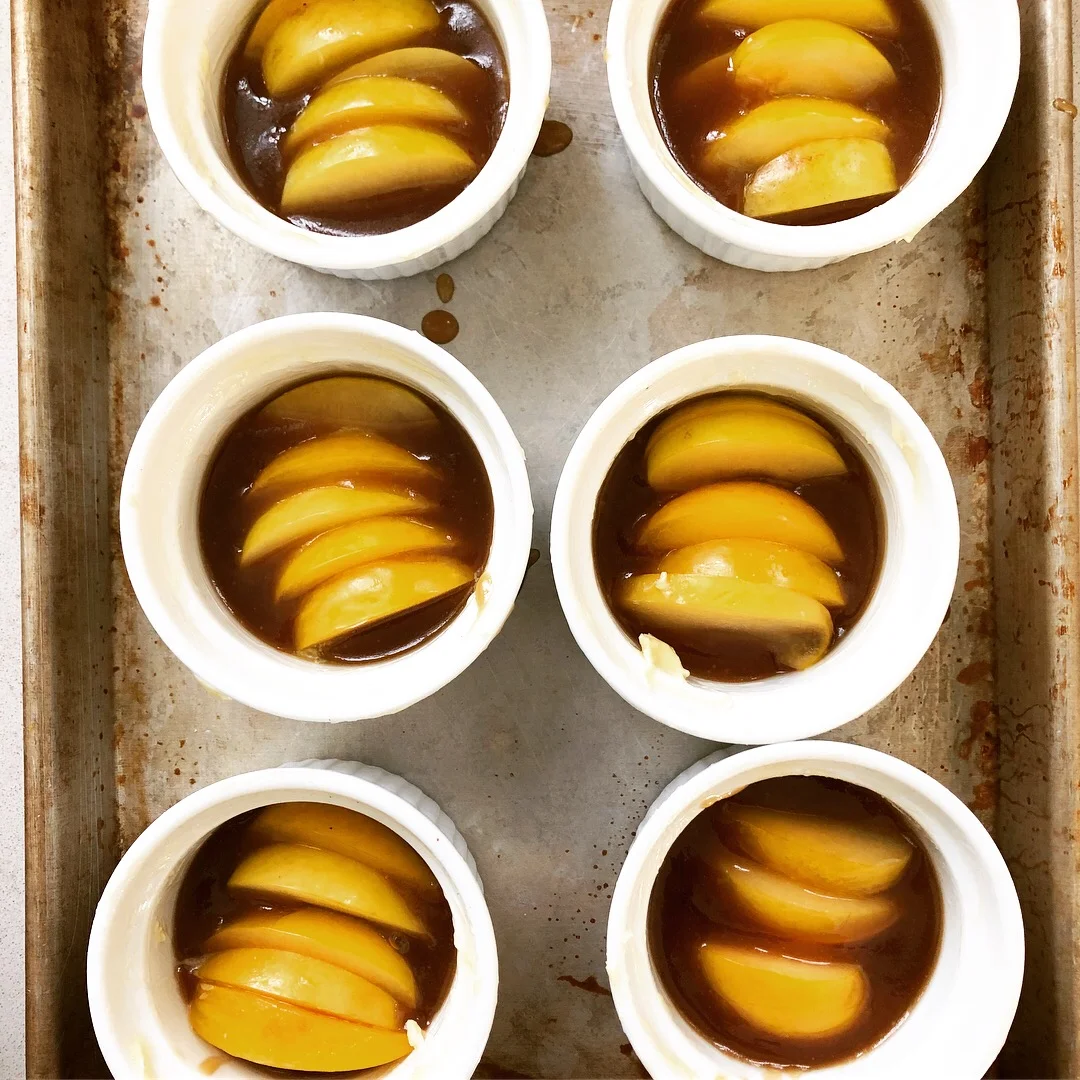
Preheat oven to 350°F. Butter the ramekins generously and place them on a small, parchment or greased foil-lined baking tray (I use a 1/4 sheet size and you will thank me for lining it in the end!). Melt 6 T of the butter in small saucepan over medium-low heat. Add brown sugar and whisk. It will separate and look super greasy at first, but persist and it will turn into a silky and smooth sauce. Pour carefully into equal amounts into the ramikins and place a fanned layer of plum slices right onto the sauce.
Sift the five dry ingredients into a smallish bowl.
Use an electric hand mixer (or wooden spoon) to cream the 4 T of butter with the sugar and orange zest. Add the egg and vanilla till combined. Alternately add the dry ingredients and the buttermilk to the batter.
Divide the batter into the ramekins and bake for 30 to 40 minutes, until the cakes are firm to the touch, and a toothpick or skewer inserted in the center comes out clean.
Cool on a rack until you can just pick them up. Run a small knife around the edges of the cake and flip onto small serving plates. If you buttered the ramekins well, the should come out easily. You may have a reluctant piece of plum to fish out and rearrange.
You can serve these warm or at room temperature. I love them with a little whipped cream that you’ve added a few spoonfuls of creme fraiche to...They don’t do quite as well the next day.
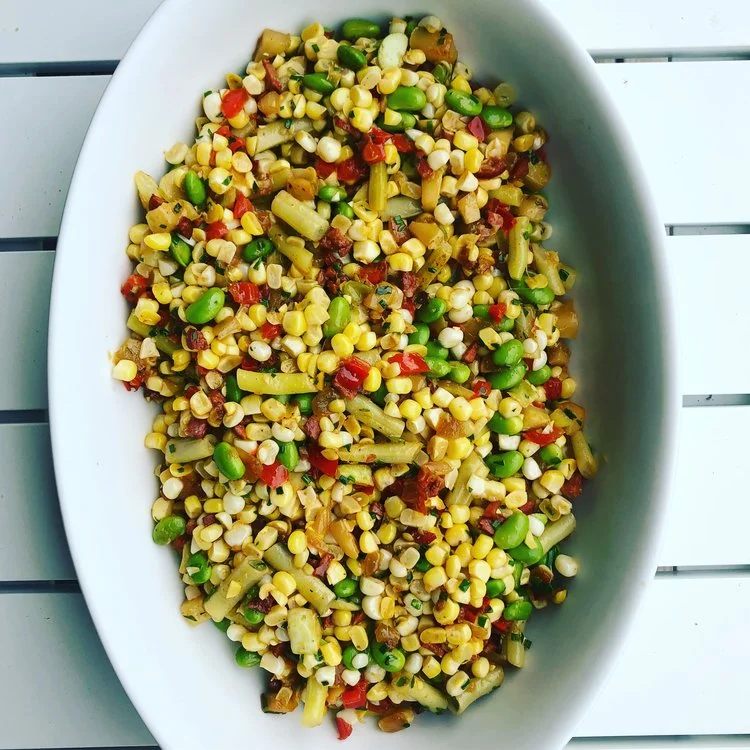
Summering Succotash
It’s Sunday and 5am. I’m tired as hell, ready for a day off, and what am I doing? Thinking, reading, and writing about food. Specifically, succotash. Honestly, I can’t believe I’m even admitting this in a public forum!
I did not grow up eating succotash, but I truly adore it. Curious about the origins of this dish, I just Googled it and was surprised to find out that the name is actually derived from a Narragansett word for “broken corn” which makes sense, corn being the main ingredient. My association with it as a southern dish is not unfounded, but it tends to be more of a catch all title for any kind of vegetable medley, involving corn.
Oh, corn! It is so good at this very August moment, but philistine that I am, I hate eating it on the cob. It literally drives my teeth insane. Because of this sad state, I am always looking for ways to eat corn off the cob. You can see where this is going, right?
But before I tell you how to cook the dish, I’m going to digress again and profess my love for flexible and easy going recipes. Also for recipes that can be prepped a bit in advance and finished off at the last minute. I also want to express adoration for a recipe that can be eaten cold the next day, uses ingredients that are local and seasonal, and (in my case) almost entirely vegetable. This recipe hits all the marks (please check out the additional suggestions below).

Summer Succotash
Ingredients
2 T butter or ghee
1/2 of a red pepper, cut in small dice
1/2 of a vidalia onion, also cut in small dice
1 clove of garlic, minced
1 link of good linguiça, cut into tiny dice
1 or 2 small patty pan squash, cut into small dice
2 T butter or ghee
4 ears of corn, shucked and kernels removed (I lay the corn on its side and cut lengthwise).
Around 12 good sized green or wax beans, quickly cooked in salty boiling water for a minute and then shocked in ice water and chopped into one inch pieces
1 C cooked Lima beans or edamame (I used edamame as there were no shell beans in at the farm)
A handful of minced chives
Salt and pepper to taste (careful with the salt-linguiça is salty!)
Method
Get a nice big sauté or frying pan and heat over medium low heat for a couple of minutes, before melting the butter. Sauté the peppers,onions, and garlic for a few minutes, stirring and NOT browning. Add the linguiça and turn the heat up a notch. When some of the fat has rendered, crank the heat to high, add the squash and a half cup of water. Shake and cook for a minute or two. Add the remaining butter and then dump in the corn and both beans. Shake and cook for another minute or two, just to heat through. Taste for salt, generously pepper and sprinkle in the chives.
Suggestions
If you want to prep ahead, stop after the squash is cooked. When you are ready to eat, heat the remaining butter in a separate pan, quickly heat up the corn and beans and then add the squash misxture.
If you don’t eat meat, omit the linguiça and maybe throw in a spoonful of smoked paprika.
As mentioned, eat this cold the next day with a little salad dressing if you like. Or reheat and top with a fried egg and hot sauce for breakfast.
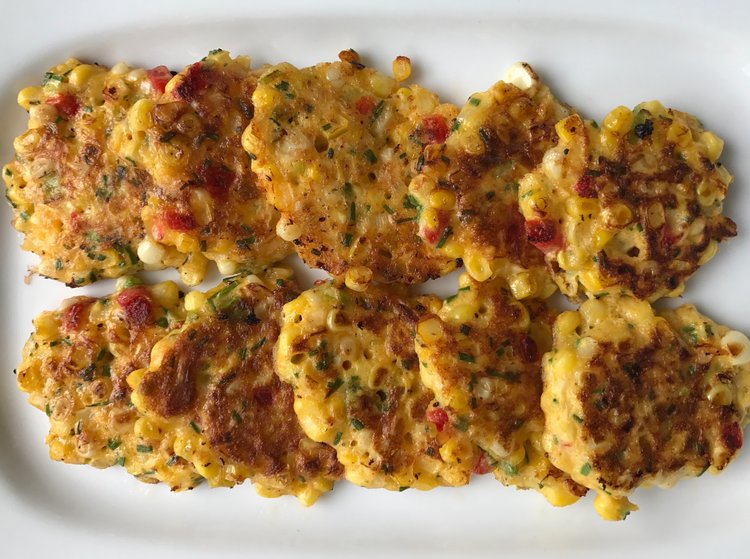
Corn Fritters from my Grandmother Marjorie
As a child, I knew my grandmother’s zucchini were out of control when the “pancakes” started showing up on the table at meal times. They were made in the same vein as her potato latkes, light and crispy-almost frilly-around the edges. Some had dill and a little cottage cheese and others had chives and no cheese at all. I grew up watching Marjorie make these kinds of recipes up, or so it seemed. Turns out, she had a general idea of the ratios for certain dishes and they could be used across a multitude of main ingredients, in this case the pancake (or fritter, as I came to know them). So, the same thing happened when her corn came in and we never complained one little bit.

Last week the corn came in at Bartlett’s Farm. This is a BIG deal on the island (I feel that it is an equally big deal when the corn at Moor’s End comes in too). I happened to be at the market when the young man wheeled the first cart up to the corn table and I asked if that indeed was the first of the year. He nodded yes and handed me an ear, smiling. I am going to admit that I had a moment where I was all like, “where’s the newspaper guy with a camera? I HAVE THE FIRST EAR OF CORN!” Yeah, I felt that I deserved a little fame for getting up early and being in the right place at the right time. Sadly, the press had NOT been alerted, and so I went on my way and took that bunch of corn and did the first thing I do every July. I made a batch of fritters and served them to my gracious clients for lunch. And said a quiet thank you to my kitchen angel, Marjorie, without whom I wouldn’t have a clue about food. Thanks, Gram. This one is for you.

Corn Fritters
Ingredients
3-4 ears of corn, shucked and kernels removed in the least messy and chaotic way you know how (no comment from me here-I tend to have sporadic luck in this department)
2-3 scallions, minced nice and fine
1/2 of a roasted red pepper (freshly made or from a jar-your choice-we just like the hint of red here)
A handful of minced chives (or any other green herb you like)
One handful of flour, I use the GF Cup-3-Cup kind, but any kind of regular flour works too
1 t baking powder
1 egg, beaten
An optional 1/2 cup of feta or other crumbly white cheese (I only do this occasionally and typically when the corn are getting older)
Salt and Pepper to taste
Yellow Oil or Ghee for frying
Method
This is literally the easiest thing in the world. Mix the first four ingredients and sprinkle the flour and powder of them and toss with a large fork. Add the egg and cheese if you are using and salt and pepper. Heat a nice large skillet over a medium heat-cast iron is best-until a drop of water dances on the surface. Pour enough oil or ghee in the pan to cover the bottom generously. Drop between an 1/8 to a 1/4 cup of the corn mixture onto the skillet and cook until brown, flip and set onto a warmed plate (you can keep them warm in a low oven if you like).
I serve these in different ways. Sometimes, I grill a piece of fish and do a fresh salsa, occasionally I get fancy and do smoked salmon, creme fraiche, pickled red onions and minced fresh dill, other times, a nice crispy chicken thigh and some sweet chili sauce does the trick. They are such a great vehicle for sauces and protein sides...Experiment, please! And let me know what you think.